Your personalized labels in just 3 steps
Create your own personalized labels online at www.votre-etiquette.com. Everything is done in your browser: no installation and no technical skills required.
Customize your labels in 3 steps
-
Choose the format
Click on « Upload a document » and select the desired format. We offer several dimensions suitable for all supports (bottles, jars, cosmetic products, etc.).
Tips: check the orientation (portrait/landscape) and allow a safety margin of ~3 mm around the edges to avoid truncating important elements.
-
Define the background
In the « Background color » selector, choose a shade. Opt for light pastel colors for optimal contrast with the text; very dark colors make the information less visible.
Readability tip: ensure a good text/background contrast (AA or higher). Avoid very thin texts on busy backgrounds.
-
Customize the content
Compose your label with the following elements:
- Text — button « Add text »
- Image/photo — button « Add an image »
- Frame/ornament — button « Add a frame »
You can add multiple elements for a creative and unique result. To ensure smooth performance, avoid unnecessarily multiplying heavy layers.
Saving your creation requires creating an account. It's free and without obligation.
Apply your label on a bottle
Our labels are self-adhesive; two methods are available to you:
-
Stick over the old label
The quickest method. Ensure that the new label is at least the same size to cover the old one. Depending on the colors and opacity of the support, a slight transparency may appear.
-
Remove the original label and then stick the new one
Longer, but the result is cleaner and more professional. Proceed as follows:

1. Soak the bottle
Immerse the bottle for ~30 minutes in lukewarm water (preferably soapy) to soften the glue.
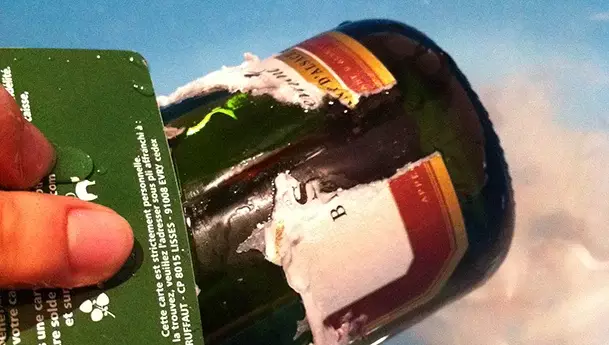
2. Peel off gently
Use a plastic card to assist you. For residues, use the non-sharp side of a knife or a cloth with a little household alcohol.

3. Dry & stick
Dry thoroughly. Once at room temperature, apply the new label from the center towards the edges.
Need help? Check our FAQ or contact us.
Technical note: for sharp visuals, choose high-quality images (ideally ≥ 150 DPI at print size).